Safe Writer is used to encrypt files (using either the 168-bit Triple DES
or variable key-length Blowfish algorithms)
and in so doing to create a Safe File (having a
.SAF extension),
which can then be safely distributed with
virtually no risk of unwanted users reading the files. A password or key provided
by the user is used for the encryption.
Safe Reader
(which is freely available) can then be used to open and decrypt the Safe File
(providing the user has the correct key).
It is increasingly accepted that the data held and processed on a PC can be of fundamental importance
to its user/owner/company. It is therefore reasonable to expect that there is
security in place to protect it from others.
To help ensure this, a range of security measures can be applied to contain a diverse range of threats.
One such measure is to protect the data from unauthorised disclosure using cryptography
(the practice of encrypting/decrypting data using a secret password or key word).
DES file encryption software will enable PC users to protect/encrypt their data/files without specialist
knowledge or difficulty. It allows data to be protected almost as routine. So
why encrypt your data? Some examples of why are:
- Where sensitive data is to be distributed or saved on portable media (e.g. floppy disks, backup drive, etc.)
- Where more than one user has access to a PC or where the data is held on a LAN.
- As an additional measure where a PC already incorporates an access control mechanism, encryption
secures the data itself, that will remain encrypted even if the PC is lost or stolen.
- Where information is to be transmitted via email or similar media.
When registering your software with your ISP, they may not have the SAF file as a registered file type.
If asking for the MIME type, then you can specify application/x-compressed, or 'binary' file type.
This will enable them to enable the uploading of SAF files to your FTP server.
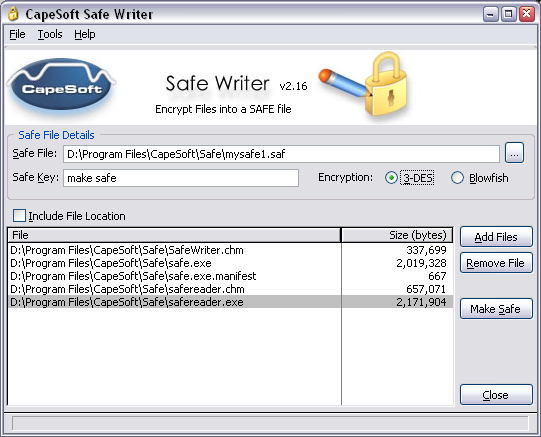
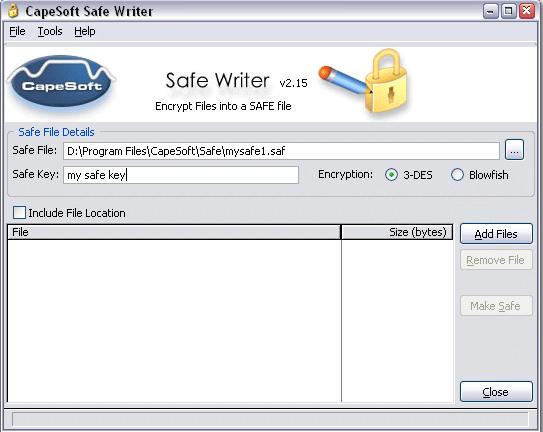
Before starting to use Safe Writer lets look at the layout of the window.
Start Safe Writer by going to the Windows Start menu, select Programs
then go to the CapeSoft Safe submenu and select the Safe Writer option.
The Safe Writer window will then appear as follows:
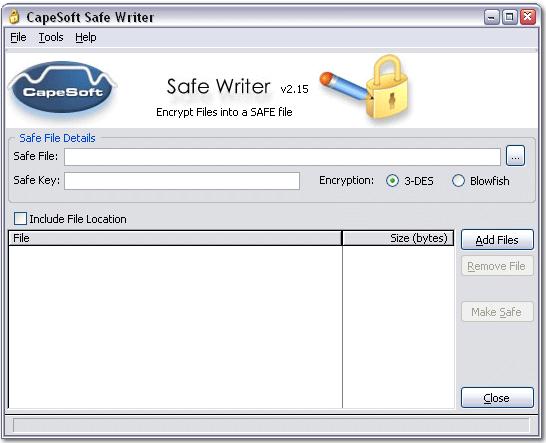
Clicking on each of the window options above will bring up a
pop-up box that provides a description of the selected option.
Safe File Creation
When the Safe File is created (having a .SAF extension),
copies of the specified files are made and encrypted using a Safe Key
(i.e. the originals of the files encrypted will still be in their original
locations). Unless the desired path is specified along with the name of the
safe, it will be created in the directory in which CapeSoft Safe Writer resides.
The Safe File is only created when the
Make Safe button is clicked. If files were to be removed from or
added to the list, or the Include File
Location checkbox was checked after the
Make Safe button was clicked, it must
be selected again to recreate the Safe File with the new settings.
Why Encrypt Files?
It is increasingly accepted that the data held and processed on a PC can be of
fundamental importance to its user/owner/company. It is therefore reasonable
to expect that there is security in place to protect it from others.
To help ensure this, a range of security measures can be applied to
contain a diverse range of threats. One such measure is to protect the data
from unauthorised disclosure using cryptography... the practice of
encrypting/decrypting data using a secret password or key word.
DES or Blowfish file encryption software will enable PC users to protect/encrypt
their data/files without specialist knowledge or difficulty. It allows data
to be protected almost as routine. So why encrypt your data? Some examples
of why are:
- Where sensitive data is to be distributed or saved on portable media
(e.g. floppy disks, backup drive, etc.)
- Where more than one user has access to a PC or where the data is held
on a LAN.
- As an additional measure where a PC already incorporates an access
control mechanism, encryption secures the data itself, that will remain
encrypted even if the PC is lost or stolen.
- Where information is to be transmitted via email or similar media.
Encrypting Files
To use CapeSoft Safe Writer to secure and encrypt files, proceed as follows:
- In the Safe file text field,
enter the path and directory where the file is to be saved and also the
name you wish to give your Safe file. If you wish to overwrite an
existing Safe File or to choose a specific directory to place the Safe
File in, you can use the Browse button to browse for the file.
- In the Safe Key text field
type in a key (password) that is to be used to encrypt the file.
Remember, whoever is to read the encrypted file(s) needs this key to
extract the files.
- Choose the Encryption method
you want by selecting one of the encryption radio buttons. Triple-DES is
more secure, while Blowfish is faster. Triple-DES uses a safe key of up
to 21 characters, whereas Blowfish accepts a key or up to 56 characters.
By pressing Ctrl+H (the control and H key simultaneously) you can
select to hide or unhide the safe key as it is typed. The
Hide option can also be activated from the Tools / Options menu.
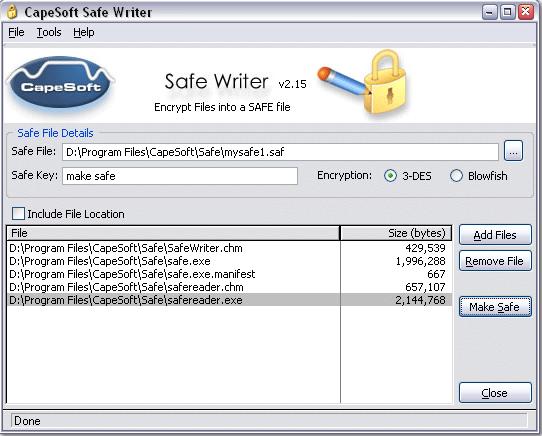
- Use the Add file button to add
the required files to the Safe File. In the event of adding one or more
unwanted files, the Remove file
button can be used to remove it from the list of files. The list box
behaves the same as a standard Windows list box.
You can also add and remove files by pressing the Insertand
Delete keys respectively.

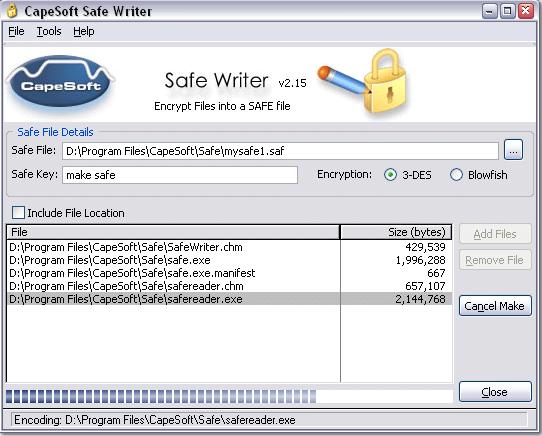
- Once all the files have been added, click the
Make Safe button to encrypt the
files and create the Safe File. As the Safe File is being created a
progress bar will reflect the progress of the encryption process.
You can also create the Safe File by pressing the
Enter key.
If the process needs to be aborted for any reason, click on the
Cancel Make button or press the
Escape key. This will stop the
Safe File being created.
- Once completed, a Done message
is displayed at the bottom of the window confirming the creation of the Safe File.
The Safe Key is Case
Sensitive, so the user who is to decrypt the file using
Safe Reader will need to enter the Safe Key using the correct capitalization.
Including the File Location
Underneath the
Safe Key text entry field, there is a
check box labelled
Include File Location.
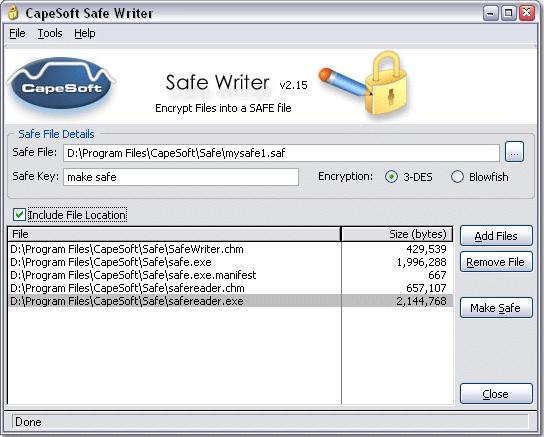
If this option is checked when the Safe File is created, the actual path of each file will be
included with the filename when the safe file is created. When the safe is
later opened (using
Safe Reader) and the file is extracted, the file will be placed in
the directory specified by the filename when creating the safe file.
Making Safe Files from the Command Prompt
Safe files can be created from the command prompt (DOS) without having to
use the actual Safe Writer user interface.
To do this, proceed as follows:
- Type the following at the command line:
<PATH>safe safeFile SafeKey <options> File1 File2 ... FileN
where:
<PATH>-
the directory path where your copy of Safe Writer is stored.
Safe - this is the name of the Safe Writer application (safe.exe -
note that the .exe can be left out)
SafeFile - this is the name of the Safe File to be created. When the
file is created it will be given a .SAF extension regardless of whether you
have included this as part of the filename.
SafeKey - this is the Key Code to be used for encryption.
<options> - The options format is a minus-sign followed by one or
more letters (upper or lower case). The order of the letters doesn't matter.
If no options are specified, the options stored in Safe Writer's .INI file
will be used, with the exception of the encryption type. Leaving out this
option will cause DES to be chosen, no matter what is in the program's .INI
file.
H: hides the safe key from being
displayed on the screen.
B: use Blowfish to encrypt the data.
D: use Triple-DES to encrypt the data.
P: include the file paths in the Safe File.
Example:
-HB hides the password and uses Blowfish for the encryption. File path names
are not included.
File1 - this is the name of the first file to be included in the Safe File.
File2 - this is the second file to be included in the Safe File.
FileN - this is the last file to be included in the Safe File. Up to
10 files can be included using the command line.
NOTE: Wildcards in the file names are acceptable.
Example command line (hide the
key, include the file path, DES encryption):
"c:\program files\capesoft\safe\safe" mysafe safekey -hp *.exe *.bat
There may be any number of files, but there should be at least
one. If there are no files on the command line, Safe Writer will
require you to add the files manually.
- Press the "Enter" key. The
listed files will now be encrypted and the Safe File will be created.
NOTE: If there are filenames in the command line but none of them is valid, an error
message to that effect will be shown on the status bar. The program will
then close after approximately 3 seconds.
You can find the Safe Writer Options by going to the
Tools
menu and clicking on
Options. The following window will be displayed:
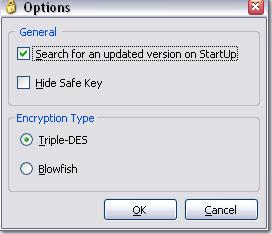
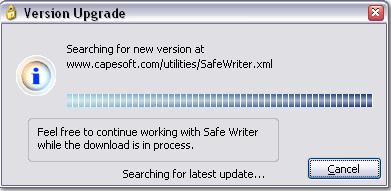
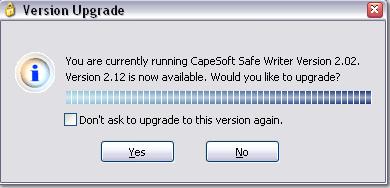
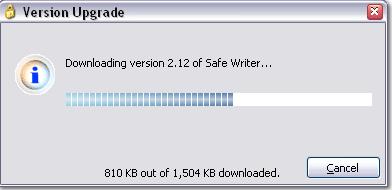
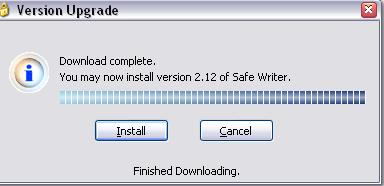
If the
Search for an updated version on
StartUp checkbox is checked, Safe Writer will attempt to search
CapeSoft's web site for a newer version of Safe Writer whenever Safe Writer
is run, and will then notify you if this is the case. It will then give you
the opportunity to download this file by the click of a button! See the
section on
"Upgrading your Safe Writer Version" for more details.
There is also the option to hide the Safe Key as you type it in. When
selected, asterisks (*) will be displayed in place of the characters as they
are typed in.
The encryption type can be selected from the Options window as well as
from the main window. Triple-DES is more secure than Blowfish but Blowfish
is a lot faster when encrypting and decrypting.
Safe Writer is © 2012 by CapeSoft. Safe Writer is
protected by copyright laws and international copyright treaties, as well as
other intellectual property laws and treaties. Safe Writer is licensed to
you by CapeSoft. You may own the media on which the software is stored, but
CapeSoft retains full and complete title to the software and all
intellectual property rights therein. CapeSoft Safe Writer may not be
reproduced or redistributed in any way without the consent of CapeSoft.
The product is provided as-is. Use it entirely at your own risk. Use of this
product implies your acceptance of this, along with the recognition of
copyright stated above. In no way will CapeSoft, it's employees or
affiliates be liable in any way for any damages or business losses you may
incur as a direct or indirect result of using this product.
Please contact

should
you have any queries.