

| General User Options | |
|---|---|
| Parameter | Description |
| user.columnHeaders | |
| user.preview | |
| user.greenbar | |
| Parameters for Printer output | |
|---|---|
| Parameter | Description |
| Maxcols | Specifies the maximum number of columns that can be included in the report. The default (and maximum allowed value) is 300. |
| user.NoLineWrapping | If true then any Carriage Return or LineFeed characters in the text will be converted to a plain space. |
| user.PagesWide | The number of pages specified by the user as the width of the report. |
| Parameters for all File output | |
|---|---|
| Parameter | Description |
| Maxcols | Specifies the maximum number of columns that can be included in the export. The default (and maximum allowed value) is 300. |
| user.Filename | The name (and path) of the file that will be created. |
| Parameters for HTML output | |
|---|---|
| Parameter | Description |
| HTMLmeta | Can contain any extra information which you wish to include
in the HTML header. For example this could be set to something
like; <meta name="description" content="Awesome Description Here"> |
| HTMLNoMakePage | Set this to true if you want the generated HTML to be something that can be included on some other web page. In other words if this is true then the <html>, <head> and <body> tags are not generated into the HTML. |
| StyleFileName | The name of a CSS file that should be included into the generated HTML. If the file is available (ie the filename is valid) then the file is included inside the generated HTML, so the CSS file does not need to be deployed. If however the filename is not available (or is a link to a web resource) then a link to the style file is generated into the HTML. |
| Parameters for Excel XLS output | |
|---|---|
| Parameter | Description |
| NoComInit | If this is set to true then the initialization of the Excel sub-system is not done. It is assumed that this has been done by some other object on the window. |
| user.PreserveDateData | Sends the data to Excel in True-Date format. |
| user.StartColumn | The column name to use as the first column for the generated output. |
| user.StartRow | The row to use as the first row of the output. |
| user.Template | The name of an Excel template file to use. The generated output will be merged into the template to create the new spreadsheet. |
| Parameters for Excel XML output | |
|---|---|
| Parameter | Description |
| user.PreserveDateData | Sends the data to Excel in True-Date format. |
| user.StartColumn | The column name to use as the first column for the generated output. |
| user.StartRow | The row to use as the first row of the output. |
| Parameters for Excel XLS output | |
|---|---|
| Parameter | Description |
| NoComInit | If this is set to true then the initialization of the Excel sub-system is not done. It is assumed that this has been done by some other object on the window. |
| Parameters for CSV output | |
|---|---|
| Parameter | Description |
| user.Delimiter | This parameter determines the separator used between the CSV fields on a row. The default, and most commonly used character is the comma (,). If a tab separator (chr(9)) is desired then the word tab can be used. This will be converted to <9> by the class. |
| user.NoDoubleQuotes | If true then double quotes will not be used around string fields. |
| user.NoLineWrapping | If true then any Carriage Return or LineFeed characters in the text will be converted to a plain space. |
| user.WrapEmptyStrings | If this is true, and the data for the column is blank, then a blank string, wrapped with double quotes, will be used in the output. If this is false then the CSV will simply contain a blank space, and the next delimiter. |
| Property | Description |
|---|---|
| AnsiCodePage (long) | The code page of the source text. This is (automatically) set using the .SetCodePage method, based on the charset of the font used by the list box. If you use a charset, and the conversion is not automatic, or incorrect, then please contact CapeSoft support. |
| Encoding (long) | The desired output encoding. The default is sendto:EncodeUtf8. Other options are sendto:EncodeUtf16 or sendto:EncodeAnsi. |

| Field | Description |
|---|---|
| Automatic Long |
Not currently used |
| CallingModule Ulong |
Only populated if WinEvent is included in the app. This is a handle to the module (DLL or EXE) where the calling procedure resides. |
| ColumnExcluded Byte,dim(MAXCOLS) |
If this is set then the column is excluded from the output. This is an array, one item for each column in the list control. |
| ColumnHeader String(255),dim(MAXCOLS) |
The header for each column. This is an array, one item for each column in the list control. |
| ColumnType Byte,dim(MAXCOLS) |
The Type for each column. This is an array, one item for each column in the list control. If set to STequ:Default then the engine will auto-detect the column type based on the field contents. If set to STequ:String then the column will be treated as a string, if set to STequ:Numeric then the column will be treated as a numeric, regardless of the data contents. |
| ForceColorFG Long |
Forces the color of the text in the output, regardless of the setting on the browse itself. |
| ForceNoGreenBar Long |
If set to true then green-barring is not available on the report. |
| Header String(255) |
The header that should appear on the top of the report. |
| HTMLmeta String(1024) |
If set then added into the <head> section of HTML output. |
| HTMLNoMakePage Long |
If set to true then the HTML output does not have a <html> wrapper, or <head> section. this makes it suitable for embedding in other HTML documents. |
| inOneRow Byte |
If set to true then the output should be all on one row, even if the list control has the data spread over multiple rows. |
| ListControl Long |
The Field Equate (FEQ) of the list control. |
| MaxBrightness Long |
Used in conjunction with ForceColorFG. If this is a value, then only colors greater (for all 3 channels) will be forced to the forced color. |
| MaxCols Long |
Not to be confused with the Equate of the same name. Usually set on the global extension. Limits the number of columns that can be exported. |
| NoComInit long |
Is set to true if the COM layer has been initialized by some other object - like Office Inside etc. |
| ProgressText String(100) |
appears on the progress window during export. Defaults to '% completed' . Can be changed to another language etc. |
| q &Queue |
A pointer to the queue that populates the list control. |
| StyleFileName String(255) |
Used when exporting to HTML. Is the name of a CSS file which will be included into the HTML document. Note that the CSS file will be included in the HTML document, not a link to the CSS file. |
| SubHeader String(255) |
The sub header that should appear on the top of the report. |
| Totaling | |
| Totals Long |
Set to true if totaling is set on for the output. |
| ColumnTotal Byte,dim(MAXCOLS) |
Is set to true if totaling for this column is set on. This is an array, one item for each column in the list control. |
| ColumnTotalFontBGColor Long,dim(MAXCOLS) |
The background color for the total. This is an array, one item for each column in the list control. |
| ColumnTotalFontFGColor Long,dim(MAXCOLS) |
The foreground color for the total. This is an array, one item for each column in the list control. |
| ColumnTotalText String(50),dim(MAXCOLS) |
The text for each sun total. This is an array, one item for each column in the list control. |
| TotalFontStyle TotalFontSize TotalFontBGColor TotalFontFGColor Long |
Settings for the Font to use on the sub total lines. These are not arrays, the same setting will be used for all the columns. |
| TotalLines Long |
If this is set to true then horizontal lines will appear on the report just above, and below, the sub total lines. |
| SortOrder String(1024) |
The current sort-order of the queue. This is used to determine sub-total breaks. |
| DontFormatNumericValues Long |
If this is set to true then numeric values in the total are not formatted according to their column's picture. |
| Sub Totaling | |
| SubTotals Long,dim(MAXCOLS) |
Is set to true if sub totaling for this column is set on. This is an array, one item for each column in the list control. |
| ColumnSubTotalFontBGColor Long,dim(MAXCOLS) |
the background color for the sub total. This is an array, one item for each column in the list control. |
| ColumnSubTotalFontFGColor Long,dim(MAXCOLS) |
The foreground color for the sub total. This is an array, one item for each column in the list control. |
| ColumnSubTotalText String(50),dim(MAXCOLS) |
The text for each sun total. This is an array, one item for each column in the list control. |
| SubTotalFontStyle SubTotalFontSize SubTotalFontBGColor SubTotalFontFGColor Long |
Settings for the Font to use on the sub total lines. These are not arrays, the same setting will be used for all the columns. |
| SubTotalLines Long |
If this is set to true then horizontal lines will appear on the report just above, and below, the sub total lines. |
| User | |
| These fields are inside a group called User. They can explicitly be overwritten by the user on the SendTo Window options screen. The values can be set in the calling procedure as default suggestions to the user. | |
| user.ColumnHeaders Long |
If set to true then column headers are included in the output. |
| user.Configure Byte |
If set to true then the ConfigureEmail procedure is called |
| user.ConfigureFTP Byte |
If set to true then the ConfigureFTP procedure is called. |
| user.Delimiter Cstring(10) |
Used in the CSV output as a delimiter between columns. |
| user.DoubleQuotes Long |
Used in the CSV output to wrap output in double quotes. |
| user.Email String(255) |
Used for emailing output - The email TO address field. |
| user.FileFormat Byte |
Indicates the type of the file being created. Set to one of STFormat:PDF STFormat:HTML STFormat:Excel STFormat:Word STFormat:CSV STFormat:XML STFormat:xCell STFormat:XMLStr STFormat:Json STFormat:ExcelCSV |
| user.FileName String(255) |
Used for file outputs - the name of the file to create. |
| user.Greenbar Byte |
If set to true then the output will have alternating green-bar backgrounds (if supported by the output format.) |
| user.IncludeTotals Long |
If set to true then totals (and sub-totals) are included in the output. |
| user.NoLineWrapping Long |
Used in CSV output to indicate that all the output should be on one line. |
| user.PagesOption Byte |
Used for Printed output. If set to false then the pages-width of the printed output will be automatically calculated. If set to true then the value in user.PagesWide will be used. |
| user.PagesWide Byte |
Used for Printed output. Indicates the width of the report (in pages). |
| user.PreserveDateData | Used for Excel output. Indicates that dates should be converted to Excels true-date type. |
| user.Preview Byte |
If set to true then an appropriate preview window will appear after the document is created (but in the case of printing, before it is printed.) |
| user.Printer String(255) |
Used for Printed output. The name of the printer to send the output to. |
| user.SendToWhat Byte |
Indicates the target for the output. Set to one of STSendTo:Printer STSendTo:File STSendTo:Email STSendTo:FTP STSendTo:Clipboard |
| user.StartColumn String(2) |
Used for Excel output. Indicates the starting column for the output. Default is column A. |
| user.StartRow Long |
Used for Excel output. Indicates the starting row for the output. Default is row 1. |
| user.Template String(255) |
Used for Excel output. Indicates a template file to use for the output. |
| user.TotalAllNumericValues Long |
If set to true then all numeric columns will be totaled. Implicitly sets the totals field to true as well. |
| user.WrapEmptyStrings Long |
Used in CSV output to wrap empty strings in double quotes. |
| Property Name | Type | Description/Use |
|---|---|---|
| q | &Queue | A pointer to the Queue containing the data for the Report/File. |
| control | long | The ID of the List control containing the Queue. |
| Header | string(255) | The text to use for the header of the Report/File. |
| TotalWidth | long | The total width factor of the Listbox - to ensure all the columns fit into the Report/File. |
| LinesPerDetail | long | Lines required for each record entry for the Report/File |
| RecIndex | long | A counter containing the Index number of the record currently 'Got' |
| ProgressValue | long | The Progress Percent of the records processed. |
| Preview | byte | Set to Preview the Report/File. |
| PreviewProgram | string(255) | A name for the program to run to preview the data. If left blank, then use ShellExecute. |
| FileName | string(255) | The name of the File containing the exported data. |
| GreenBar | byte | If set to 2, then Greenbar is disabled, otherwise, it is used to switch between showing and hiding the background for the Greenbar effect. |
| Opened | byte | Indicates whether a file has been opened successfully. |
| fontName | string(40) | Contains the Fontname of the ListBox to use as the default (if the cell has no font) |
| fontSize | long | Contains the Fontsize of the ListBox to use as the default (if the cell has no font) |
| fontStyle | long | Contains the Fontstyle of the ListBox to use as the default (if the cell has no font) |
| fontColorFG | long | Contains the TextColor of the ListBox to use as the default (if the cell has no TextColor) |
| fontColorBG | long | Contains the BackColor of the ListBox to use as the default (if the cell has no BackTextColor) |
| fontCharset | long | Contains the Characterset of the ListBox to use as the default (if the cell has no CharacterSet) |
| Styles | Group,pre(Styles),Dim(255) | An array to store the ListBoxes style array during the Report/File formatting. |
| FontName | string(40) | Name of the Font for this stylegroup |
| FontSize | long | Size of the Font for this stylegroup |
| FontStyle | long | Style of the Font for this stylegroup |
| CharSet | long | CharacterSet of the Font for this stylegroup |
| ColorFG | long | Text color for this stylegroup |
| ColorBG | long | Background color for this stylegroup |
| Picture | string(32) | Picture used for this stylegroup |
| Exists | byte(0) | Set if this propstyle array row is used. |
| End | ||
| Icons | Group,Dim(255) | An array to store the Icon file names, and whether they exist or not. |
| IconName | string(255) | Name of the Font for this stylegroup |
| Exists | byte(0) | Set if this propstyle array row is used. |
| End | ||
| File | string(255) | Used to store the name of the file created (also contains the error code if the file was not created). |
| clm | Group,dim(MAXCOLS1),pre(clm) | An array containing formatting for each column. |
| Exists | byte | Set if this element of the queue is present in the List box. |
| width | long | Contains the width of the column |
| RightBorder | byte | Set if there is a border on the right of the column |
| LastOnLine | byte | Wraps the next field to the start of the next line |
| RunningWidth | long | Used to ensure the width of the column is not too small (for the data) |
| Header | string(255) | Contains the text for the heading of the column |
| HeaderAlign | string(6) | Contains 'left', 'center' or 'right' dependent on which alignment the header is. |
| HeaderLeft | byte | Set if the Header is left justified |
| HeaderRight | byte | Set if the Header is right justified |
| HeaderCenter | byte | Set if the Header is center justified |
| HeaderDecimal | byte | Set if the Header is decimal left justified |
| HeaderOffset | long | Offset of the Header text |
| HeaderControl | long | Used for the control of the header text in a report |
| Align | string(6) | contains 'left', 'center' or 'right' dependent on which alignment the column is |
| Underline | byte | True if the column text is underlined |
| Picture | string(40) | The picture of the column text |
| GroupNo | long | The number of the group that this field is part of. |
| FieldNo | long | Contains the field number of the queue that is the first in the list. If blank, than the field number is assumed to be incremented from the previous columns field. |
| Left | byte | Set if the column text is left justified. |
| Right | byte | Set if the column text is right justified. |
| Center | byte | Set if the column text is center justified. |
| Decimal | byte | Set if the column text is decimal justified. |
| Offset | long | Contains the offset of the text. |
| Color | long | Set if there are color settings for this column. |
| TextColor | long | Contains the color of the text. |
| BackColor | long | Contains the color of the background |
| Icon | byte | Set if there is an icon attribute for this column |
| IconTrn | byte | Set if the icon is transparent |
| CellStyle | byte | Set if the cell can be individually formatted with a style. |
| ColStyle | byte | Contains the default style for the column (if used). |
| DetailControl | long | The ID of the control containing the text for the cell. |
| IconControl | ulong | The ID of the IconControl to contain the icon for the cell. |
| DetailText | string(255) | The formatted text to be placed in the cell to be exported. |
| RunningColumn | long | The physical column that this column occurs in (numbered from left to right) |
| RunningRow | long | The physical row that this column occurs in (numbered from top to bottom) |
| End | ||
| grp | group,dim(MaxCols),pre(grp) | This Group contains the settings for Group headers. |
| Header | string(255) | Contains the heading text (for the group) |
| HeaderAlign | String(6) | Alignment |
| HeaderLeft | byte | Left justified (if set) |
| HeaderRight | byte | Right justified (if set) |
| HeaderCenter | byte | Center justified (if set) |
| HeaderDecimal | byte | Decimal justified (if set) |
| HeaderOffset | long | Offset for justification |
| HeaderControl | long | Control to contain the group header string |
| Columns | long | The number of columns in this group. |
| Exists | byte | whether the group exists (as a group) or not |
| Width | long | The total width of the group. |
| Rows | long | The rows that exist in this group (i.e. the amount of cells with the LastOnLine attribute in them). |
| End | ||
| ProgressText | string(100) | Contains the text for the Progress string on the Progress Window. |
| StyleFile | string(255) | The name of the style file (for HTML files) |
| NoOfColumns | long | The number of columns wide that the output will contain. |
| LastColumn | long | The number of the last column |
| RunningColumns | long | The number of physical columns that will be used in the output |
| RunningRows | long | The number of physical rows that will be used in the output. |
| HeaderRows | long | The number of physical rows that will be used in the output header |
| WriteToClipboard | byte | Set in order to write to clipboard (rather than file). |
| PreserveDateData | long | Set in order to present date data in true-date format (in Excel exports). |
| NoColumnHeadings | long | Set in order to prevent column headings from being generated (into Word, CSV and Xcel) |
| MethodName | Parameters | Description |
|---|---|---|
| DisplayProgress | (*Byte ProgressValue, Long ProgressControl' long ProgressText=0) |
Set and Display the value for the progress control on the
progress window. Parameters: ProgressValue - a handle to the Progress thermometer ProgressControl - the ID of the progressbar ProgressText - the ID of the ProgressText string. |
| Init | (Queue pQueue, Long pListControl, <SendToOptionsGroup pOptionsGroup>) |
Initialize the object - set queue pointer, and gets the list
properties and styles. Parameters: pQueue - the queue that contains the data pListControl - the ID of the control containing the data pOptionsGroup - a group containing the SendTo options |
| Next | (),Long | Populates the queue buffer with the next record in the queue. Returns a 0 if record is OK, otherwise the next failed. |
| LoadIcons | () | This procedure loads the list controls icon array into aSendTo icon array. |
| LoadListBoxProperties | () | Get the all the listbox's format properties. |
| LoadStyles | () | Get the list box's style arrays. |
| Run | () | Run the program associated with the file created. |
| ErrorTrap | (Long p_Code, String p_Text) | Display an error that occurs. Parameters: p_Code - the errorcode that occurred. p_Text - the message text that must be displayed. |
| _FontColor | (long p_Col),Long | Returns the FontColor for this specific cell. Parameters: p_Col - the column number of the cell |
| _FontBackGroundColor | (long p_Col),Long | Returns the BackGroundColor for this specific cell. Parameters: p_Col - the column number of the cell |
| _FontName | (long p_Col),String | Returns the FontName for this specific cell. Parameters: p_Col - the column number of the cell |
| _FontStyle | (long p_Col),Long | Returns the FontStyle for this specific cell. Parameters: p_Col - the column number of the cell |
| _FontSize | (long p_Col),Long | Returns the FontSize for this specific cell. Parameters: p_Col - the column number of the cell |
| _FontCharset | (long p_Col),Long | Returns the CharacterSet for this specific cell. Parameters: p_Col - the column number of the cell |
| Kill | () | Dummy method for classes derived from the base class. |
| Open | () | Dummy method for classes derived from the base class. |
| CreateHeader | () | Dummy method for classes derived from the base class. |
| WriteColumn | (<string pDetails>, <long pColumn>, byte pHeader=0, <string pAlign>, long pSpan=0) |
Writes the Details into the cell/block specified (and sets up
styling and alignment as necessary. If Details is blank, a blank
detail is written. Parameters: pDetails - the content of the string to place in the control pColumn - the column number pHeader - set if this is the header, otherwise cell is in the body. pAlign - an optional alignment string |
| EndHeaderRow | () | Code to run at the end of a Header row (like adding into the file and incrementing the column) |
| EndDetailRow | () | Calls the parent EndHeaderRow - but allows for overwriting if other code is required. |
| SetDetail | () | Dummy method for classes derived from the base class. |
| GetFontStyleName | (long pFontType),string | Return's the name(i.e. string description) of the FontType. Parameter: pFontType - contains the FontType equate |
| Debug | (string pDebugStr) | Output debug information for debugging. Parameters: pDebugStr - the debug string to output. |
| _CellStyle | (long p_Col),long | Returns the style number for the cell of
the column. Parameters: p_Col - the column number. |
| _ColorEquate | (long pColor),long | Returns the closest Clarion color equate (for Word and Excel) Parameters: pColor - the color used. |
| OldNoOfColumns | (),long | Returns the number of columns that appear in the output (taking into account the LastOnLine columns) |
| NoOfRows | (),long | Returns the number of rows that appear in the output (taking into account the LastOnLine columns) |
| GetProgress | (),long | Returns the value to display on the progress bar/counter |
| SetFormulaLanguage | (Long pLanguage=sendto:English) | Sets the formula text (SUM, AVERAGE, COUNTA) for exporting to Excel. Supported languages are sendto:English, sendto:Danish, sendto:Dutch, sendto:Finnish, sendto:French, sendto:German, sendto:Italian, sendto:Norwegian, sendto:Spanish, sendto:Swedish |
| Property | Type | Description/Use |
| Report | &Report | A pointer to the pre-defined report (in the report procedure) |
| ReportHeader | long | The control on the report that contains the Header of the report |
| ReportDetail | long | The control on the report that contains the detail |
| ReportFooter | long | The control for the report footer |
| ReportTitle | long | The control for the title of the report |
| HeaderBox | long | The box control around the header |
| DetailBox | long | The box around the detail of the report |
| FooterBox | long | The box around the footer of the report |
| WidthFactor | Real | A property used to factor out the size of the paper with the widths of columns in the list box. |
| LineHeight | long | A property used to work out the height of the detail line. |
| LineSpacing | long | If required - used to create uniform spaces between the lines |
| CellSpacing | long | Ensure uniform spaces between cells of data. |
| TotalPages | long | A property containing the amount of pages required for a report. |
| LinesPerPage | long | Contains the maximum amount of lines used in a page |
| HeaderYPos | long | Contains the position of the header of the list in the report. |
| FirstControl | long | Contains the x position of the first cell in the report. |
| DetailYPos | long | Contains the starting point of the row of detail cells to print |
| PagesWide | long(1) | The amount of pages (across) to use. Set to 0 for automatic. |
| PagesWideCount | long | Contains the running count of the amount of pages (across) used. |
| LastControl | long | Keeps a track of the last control number used (for the creating of the report controls) |
| FirstColumn | long | Contains the FirstColumn that was used for the current page (or last page) printed. |
| FirstRunningColumn | long | Contains the First physical Column (from left to right) that was used for the current page (or last page) printed. |
| LastRunningColumn | long | Contains the Last physical Column (from left to right) that was used for the current page (or last page) printed. |
| StartWidth | long | The first column's width in this page (across). |
| PageWidth | long | Total width for this page (across) |
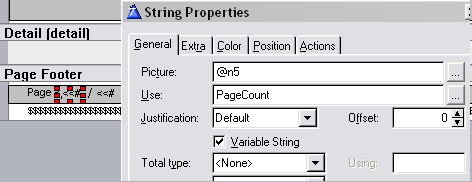
| PageCount | &long | Contains a pointer to the variable used to track the pagecount on the report. |
| LinesOnThisPages | long | Tracks the lines used on the page (vertically). |
| PaperWidth | long | Contains the width of the paper to use |
| PaperHeight | long | Contains the height of the paper to use |
| TotalLinesPrinted | long | Contains a running tally of the detail bands printed |
| Method name | Parameters | Description |
| CreateHeader | (byte pFirstTime=0) | It creates the columns with their respective headers. |
| CreateDetail | ( ) | This method creates each detail band and the controls in the detail band. |
| SetDetail | ( ) | Sets the properties for the cells of the detail band. |
| Init | (Queue p_Queue, Long p_ListControl) |
Initializes the object. |
| Greenbar | ( ) | Sets the greendbar effect on the report. |
| Next | (),long | When all the records are retrieved, redo from start if the PagesWide > 1. |
| ArrangePages | (*Queue pQueue) | Once all the pages are printed, arrange into the correct order. |
| GetProgress | (),long | Returns the correct progress value (when multiple pages wide is used) |
| Kill | () | Used to dispose the Draw object. |
| SetPageWidth | (long pPaper) | This method sets the PaperWidth and PaperHeight properties for the paper used in the report. pPaper is an equate containing the Clarion paper ID. |
| EndPage | ( ) | This method checks whether an EndPage is required and enforces one if the LinesOnThisPage = LinesperPage. Calculation using the height of the detail bands and the Report height does not match the printed output. |
| OpenReport | (long pPaper=0 ) | This method creates the report outline and sets the various report properties. |
| Property | Type | Description/Use |
| detail | string(65535) | The complete datastring of all the columns to be added to the file. |
| clipboardstring | any | Contains a string that will be sent to the clipboard. |
| clipboardstringlen | long | Contains the length of the string that will be sent to the clipboard. |
| delimiter | string(',') | Contains the delimiter that will be used in a CSV export. |
| Method name | Parameters | Description |
| Kill | ( ) | Close the file and kill the object |
| CreateHeader | ( ) | Creates the header of the file (column headers to match the columns) |
| WriteColumn | (<string pDetails>, <long pColumn>, byte pHeader=0, <string pAlign>, long pSpan=0) |
Writes the Details into the block specified. If Details is
blank, a blank detail is written. Parameters: pDetails - the content of the string to place in the control pColumn - the column number pHeader - set if this is the header, otherwise cell is in the body. pAlign - an optional alignment string |
| EndHeaderRow | () | Writes the record to the file and clears the detail string. |
| Open | ( ) | Opens the file to store the export. |
| SetDetail | ( ) | Creates the text to be entered into the file. |
| Init | (Queue pQueue, Long pListControl, <SendToOptionsGroup pOptionsGroup>) |
Calls the parent Init method and sets the name of the
PreviewProgram to run. |
| WriteToFile | (*string pStringToWrite, ulong pBytesToWrite) |
A method that writes the string passed to the file (or the clipboard if the output is the clipboard). |
| Property | Type | Description/Use |
| meta | string(1024) | A property which allows you to write stuff into the meta tag section at the beginning of the HTML doc. |
| Method name | Parameters | Description |
| CreateFooter | ( ) | Ends off the doc. |
| CreateHeader | ( ) | Creates the doc, sets the styles and creates the columns' heading text and the title text. |
| WriteColumn | (<string pDetails>, <long pColumn>, byte pHeader=0, <string pAlign>, long pSpan=0) |
Writes the Details into the cell specified (and sets up styling
and alignment as necessary). If Details is blank, a blank detail
is written. Parameters: pDetails - the content of the string to place in the control pColumn - the column number pHeader - set if this is the header, otherwise cell is in the body. pAlign - an optional alignment string |
| EndHeaderRow | () | Code to run at the end of a Header row (like adding into the file and incrementing the column) |
| EndDetailRow | () | Code to run at the end of a Detail row (like adding into the file and incrementing the column) |
| Init | (Queue pQueue, Long pListControl, <SendToOptionsGroup pOptionsGroup>) |
Calls the parent.init method and suppresses the Greenbar property (if not required). |
| SetDetail | ( ) | Sets the greenbar effect and the styles of the cell text. |
| _Color | (long p_Color) | This method returns the hex RGB value of a Clarion RGB color
long format. Parameters: p_Color - a long containing the RGB Clarion color. |
| _DecToHex | (Byte p_Decimal) | Converts a byte to a Hex string. Parameters: p_Decimal - a byte containing the number to convert to hex. |
| Kill | ( ) | Creates the footer and then kills the object. |
| _ReadCSSFile | (byte pAddInFont=1),string | This method returns the contents of the Style file, optionally
modified to contain the FontName of the browse. Parameters: pAddInFont - If set, adds the Font name in, where required. |
| Property | Type | Description/Use |
| Excel | &oiExcel | A pointer to the OfficeInside Excel object. |
| StartColumn | string(2) | The column to start the first cell to export |
| StartRow | long | The Row to start the first cell to export |
| RowNumber | long | Used for storing the row where the object is writing to. |
| ColumnNumber | string(2) | Used for storing the column where the object is writing to. |
| ColumnNumberB | byte,dim(2),over(ColumnNumber) | Used for incrementing the column where the object is writing to. |
| TemplateFile | string(255) | Contains the name of the template file to use. |
| WidthFactor | Real | A property used to factor out the size of the spreadhsheet with the widths of columns in the list box. |
| NumColors | long | Number of colors used in the custom excel palette |
| ColorPalette | long, dim(40) | Colors in the excel palette, allows existing colors to the fetched |
| CurColor | long | The current color in the excel palette |
| PalettePos | long | The position of the current color in the palette |
| Method name | Parameters | Description |
| Open | ( ) | Opens the excel spreadsheet. |
| Close | ( ) | Closes the spreadsheet. |
| CreateHeader | ( ) | Creates the header of the spreadsheet |
| WriteColumn | (<string pDetails>, <long pColumn>, byte pHeader=0, <string pAlign>, long pSpan=0) |
Writes the Details into the cell specified (and sets up styling
and alignment as necessary). Parameters: pDetails - the content of the string to place in the control pColumn - the column number pHeader - set if this is the header, otherwise cell is in the body. pAlign - an optional alignment string |
| EndHeaderRow | () | Code to run at the end of a Header row (like adding into the file and incrementing the column) |
| Init | (Queue pQueue, Long pListControl, <SendToOptionsGroup pOptionsGroup>) |
Calls the parent.init and sets up some of the initial settings. |
| SetDetail | ( ) | Formats the cells and writes the data to the cells. |
| _IncrementColumn | ( ) | An internal method used to increment the column letter. |
| Kill | ( ) | Closes the doc and kills the excel object. |
| _CheckForFormula | (string pDataString),long | Returns True if the string contains formula characters Parameters: pDataString - The string to pass to Excel. |
| _ColumnName | (string pColumn), string | |
| _HasFormulaChars | (string pCheckString, long startPos=1),long |
|
| GetPaletteColor | (long pColor), long | Returns zero if the color is not in the palette, or the position if it is |
| AddPaletteColor | (long pColor) |
| Property | Type | Description/Use |
| Word | &oiWord | A handle to the Office Inside Word object required. |
| RowNumber | long | Used for storing the row where the object is writing to. |
| ColumnNumber | long | Used for storing the column where the object is writing to. |
| TemplateFile | string(255) | Contains the name of the template file to use. |
| TableNumber | long | The number of the table created. |
| Method name | Parameters | Description |
| Open | ( ) | Creates the word document |
| Close | ( ) | Saves and closes the word document |
| CreateHeader | ( ) | Creates the header of the document and the table for the text. |
| Init | (Queue pQueue, Long pListControl, <SendToOptionsGroup pOptionsGroup>) |
Inits the object and the Office Inside word object. |
| SetDetail | ( ) | Write the necessary to text to the cell and format the style of the cell. |
| WriteColumn | (<string pDetails>, <long pColumn>, byte pHeader=0, <string pAlign>, long pSpan=0) |
Writes the Details into the cell/block specified (and sets up
styling and alignment as necessary. If Details is blank, a blank
detail is written. Parameters: pDetails - the content of the string to place in the control pColumn - the column number pHeader - set if this is the header, otherwise cell is in the body. pAlign - an optional alignment string |
| EndHeaderRow | () | Code to run at the end of a Header row (like adding into the file and incrementing the column) |
| Kill | ( ) | Close the document and kill the objects. |
| Property | Type | Description/Use |
| SendToFile | &SendToBase | The handle of the object to use to create the file. |
| Method name | Parameters | Description |
| Init | (SendToBase pSendToClass, queue pQueue, long pListControl, string pFilename, byte pPreview=0, SendToOptionsGroup pOptionsGroup), long |
Inits the SendToObject, sets up the required options and opens
the document, as well as creating the header. Returns 0 if
successful. Parameters: pSendToBase - a handle to the SendTo object. pQueue - the queue containing the data for the output. pListcontrol - the list control displaying the pQueue. pFileName - the file to export the data to. pPreview - set if the file must be previewed. pOptionsGroup - a group containing the various options (class type dependent). |
| Next | (*long pRecordsProcessed, *byte pThermometer, long pThermometerCtrl, long pProgressText=0),long |
Calls the SendTo object's next method and handles the update of
the Progress bar. Parameters: pRecordsProcessed - a handle to the variable containing the records processed. pThermometer - a percentile incrementor for the Progress bar. pThermometerCtrl - the ID of the progress bar. pProgressText - the ID of the progress text string on the Progress window. |
| Kill | ( ) | Kills the SendTo class and runs the file preview (if required) |
| Demo\abcdemo.app | This demonstrates the use of SendTo in a simple single-EXE stand-alone ABC application. It shows the use of all the SendTo templates. (Clarion6 demonstrates the use of PDF generation) |
| multi DLL\root.app and mainexe.app | This demonstrates the use of SendTo in a multi-DLL application (ABC) where the SendTo procedures reside in the DataDLL (root.app), while the procedures from which SendTo is used resides in the mainexe. |
| SendTo with wPDFControls\ abcdemo.app | These two applications (one for legacy and one for ABC) demonstrate the use of SendTo using wPDFControls for PDF file export. |
| SendTo with PDFTools\ abcdemo.app |
This ABC application demonstrates the use of SendTo using PDFXChange to generate PDF files. |
| SendTo with xFiles\ abcdemo.app |
This ABC application demonstrates the use of SendTo with XML output. |
| SendTo with FTP\ abcdemo.app |
This ABC application demonstrates the use of SendTo with export to FTP (requires NetTalk). |

Check out general product CompilerErrors.
| CapeSoft Support | |
|---|---|
| Email: | 
|
| Telephone | +27 87 828 0123 087 828 0123 |